Virtual Assessment Instructions
How to Take Great Smile Photos at Home
Follow these steps so we can see your smile and give you the best possible care, all from the comfort of home!
What You’ll Need:
- A smartphone with a camera
- Good lighting (natural daylight works best)
- Clean fingers or two clean spoons to help pull back your cheeks
- A friend or family member to take the photos (optional but helpful!)
Step-by-Step: Take These 5 Photos
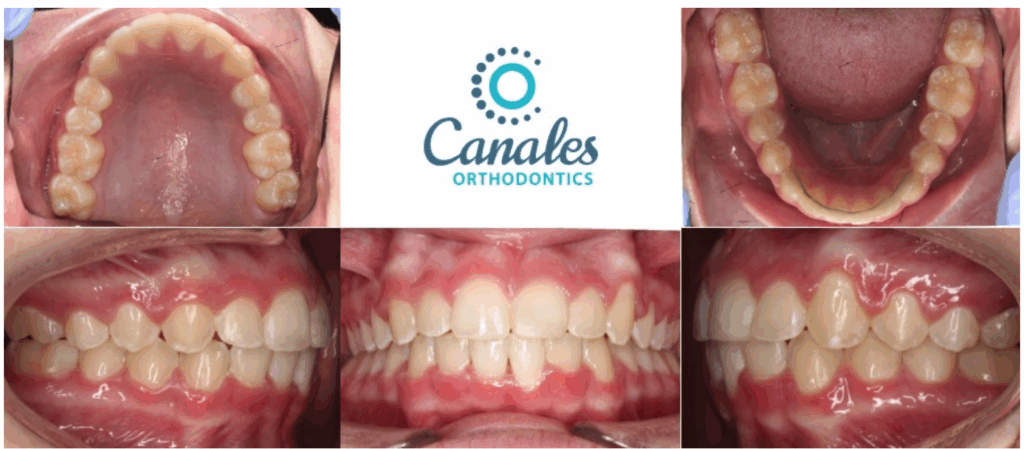
1. Front Smile (Teeth Together)
- Look straight at the camera
Smile naturally with your teeth touching - Make sure your whole smile is in the photo
- Tip: Use your fingers or spoons to gently pull your lips back if needed.
2. Right Side (Teeth Together)
- Turn your head slightly to the right
- Bite down naturally
- Pull your right cheek back so we can see how your back teeth fit together
- Tip: Use a spoon to gently pull your cheek back.
3. Left Side (Teeth Together)
- Turn your head slightly to the left
- Bite down naturally
- Pull your left cheek back to show the left side of your bite
4. Top Teeth
- Tilt your head back
- Open your mouth wide
- Have someone take a photo of your upper teeth from above
- Tip: Try lying down with the camera directly over your mouth.
5. Bottom Teeth
- Tilt your chin down
- Open your mouth wide
- Have someone take a photo looking down at your lower teeth
Tips for Great Photos:
- Take photos in a well-lit room or near a window
- Make sure your teeth are clean and lips are dry
- Keep your camera steady and close (but not too close)
- If the photo is blurry … try again!
Once You’re Done
Text us your photos and you are all set! We will review your photos and get back to you with next steps